The Ngage Warehouse App allows inventory querying, inventory level and location updates, new inventory addition, warehouse pick and pack.
This App can only be used in conjunction with the Ngage Desktop POS system, and also integrates with the Linea Pro Scanner attachment.
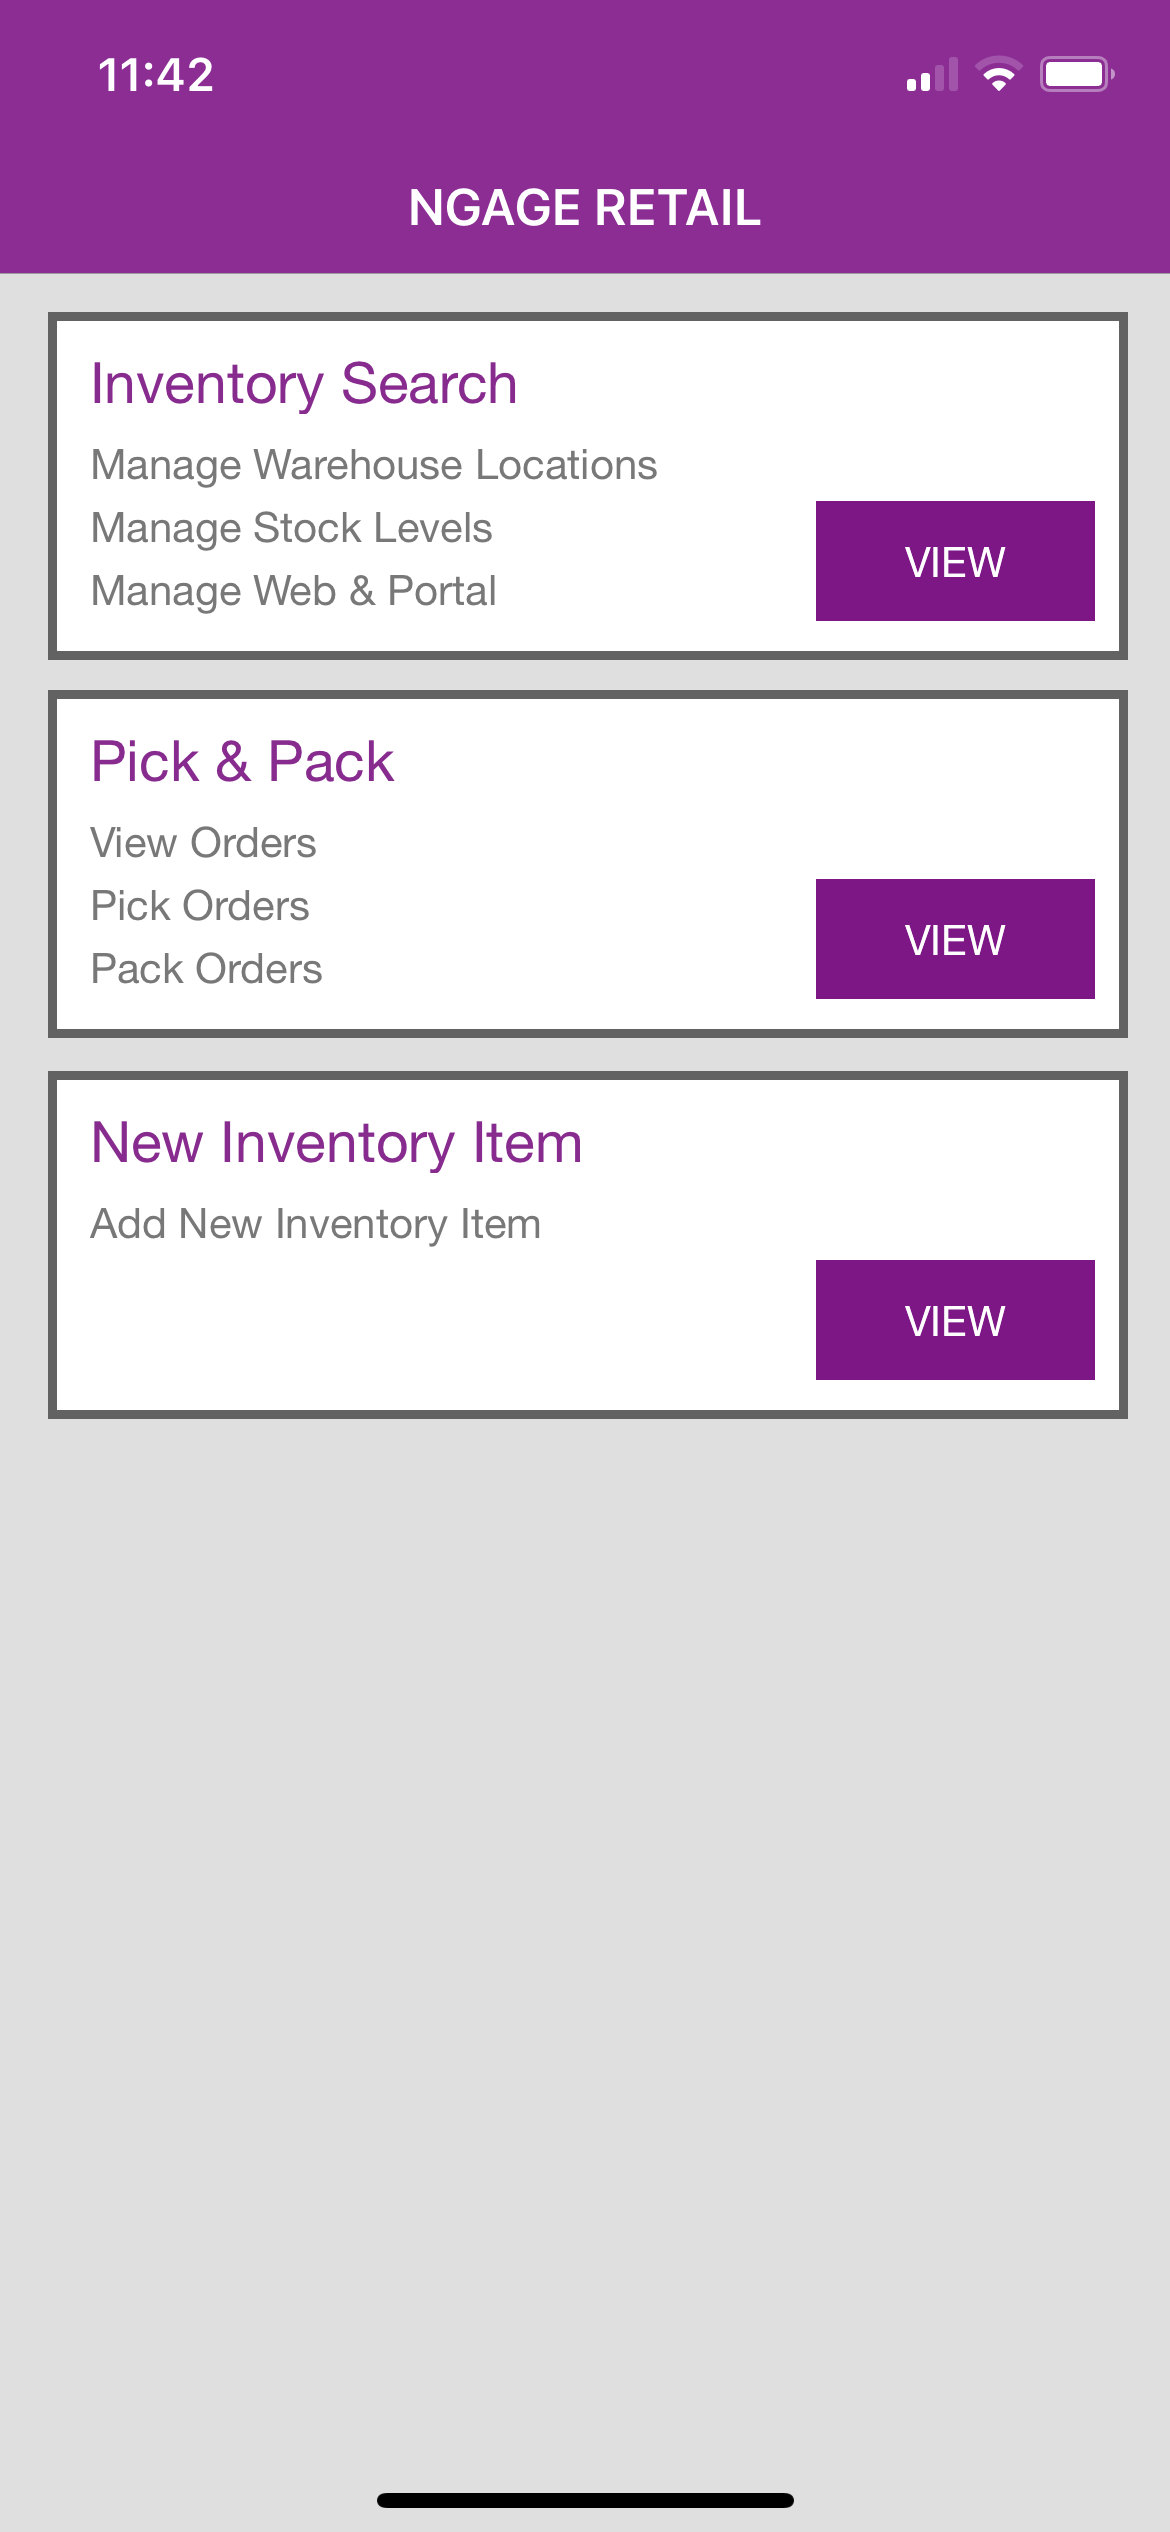
The app has 3 main functions:
- Product querying
- Adding a new product
- Pick & Pack
Settings
Before starting the App for the first time, you will require a Key and Service URL, if you do not have this information please contact Ngage Software.
Navigate the iPhone settings area and find the Warehouse App, you will then need to populate the following:
Linea Pro Scanner:
Swipe right on this button if you are using the Linea Pro Scanner with the Ngage Warehouse App.
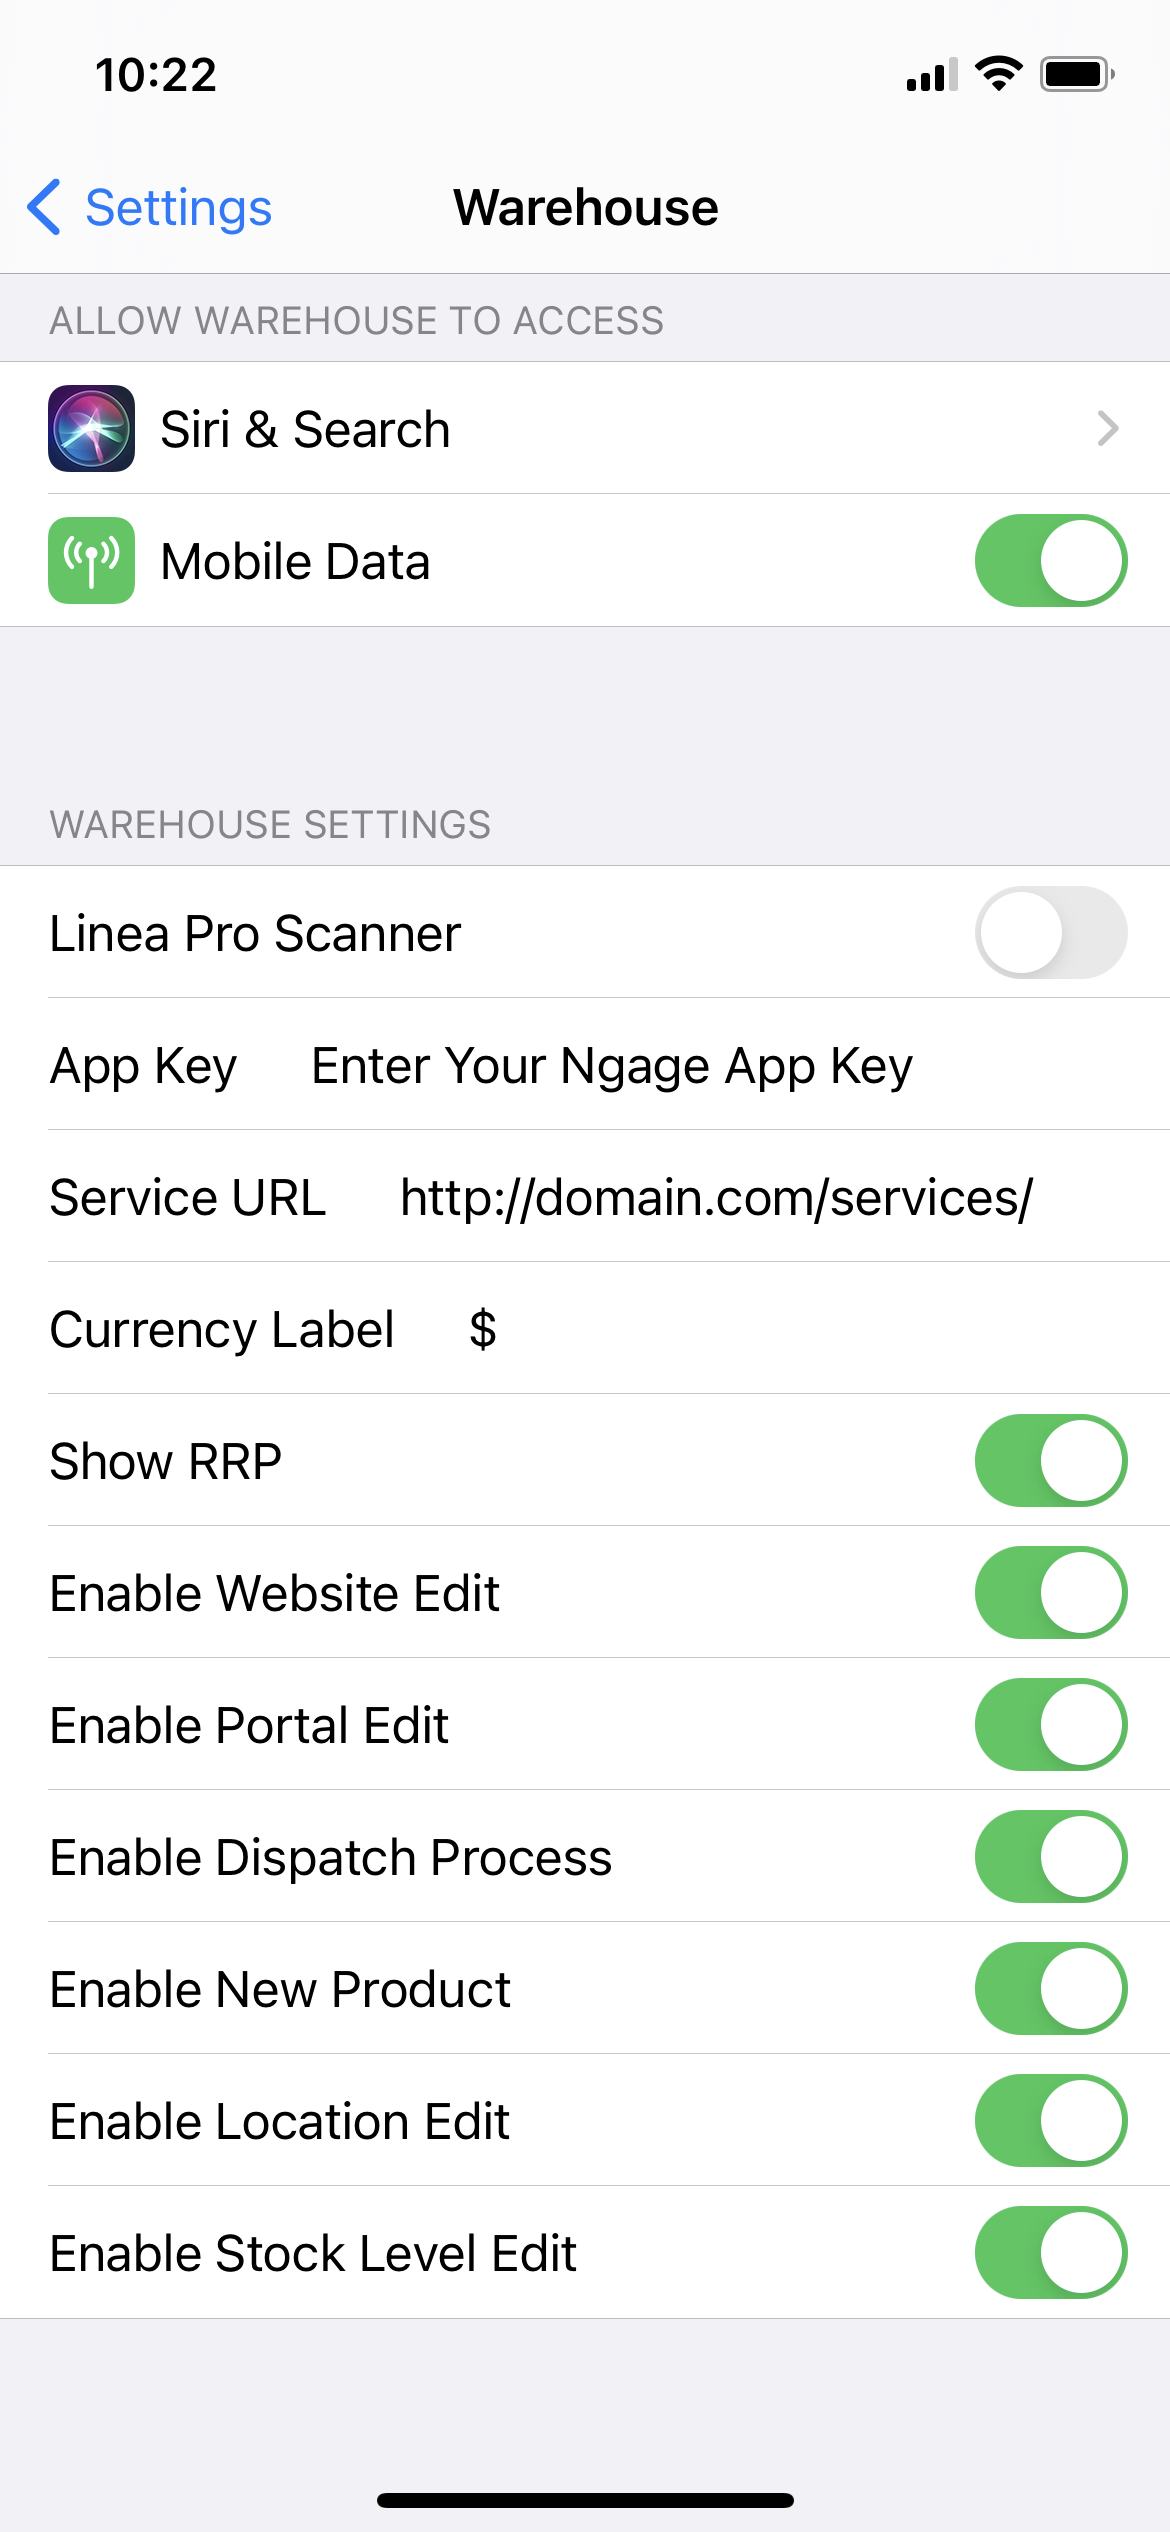 App Key:
 Enter your Ngage App key here (provided by Ngage Software).
Service URL:
Please enter the service URL here (provided by Ngage Software).
Currency Label:
Please enter the currency symbol for use throughout the app.
Edit Switches:
Allow the app use various edit functions
Product querying
- Click ‘Product Query’ button.
- If you have the Linea Pro scanner attachment, click the scan button on the side of the scanner attachment. If you do not have the scanner attachment, click 'Scan Barcode' button and you can the scan a product barcode by using the phones' camera.
- Alternatively, instead of scanning the barcode, you can enter the SKU (Stock Keeping Unit).
- If more than one product variation is found, a list of variations will be displayed for you to choose from.
- Product actions include
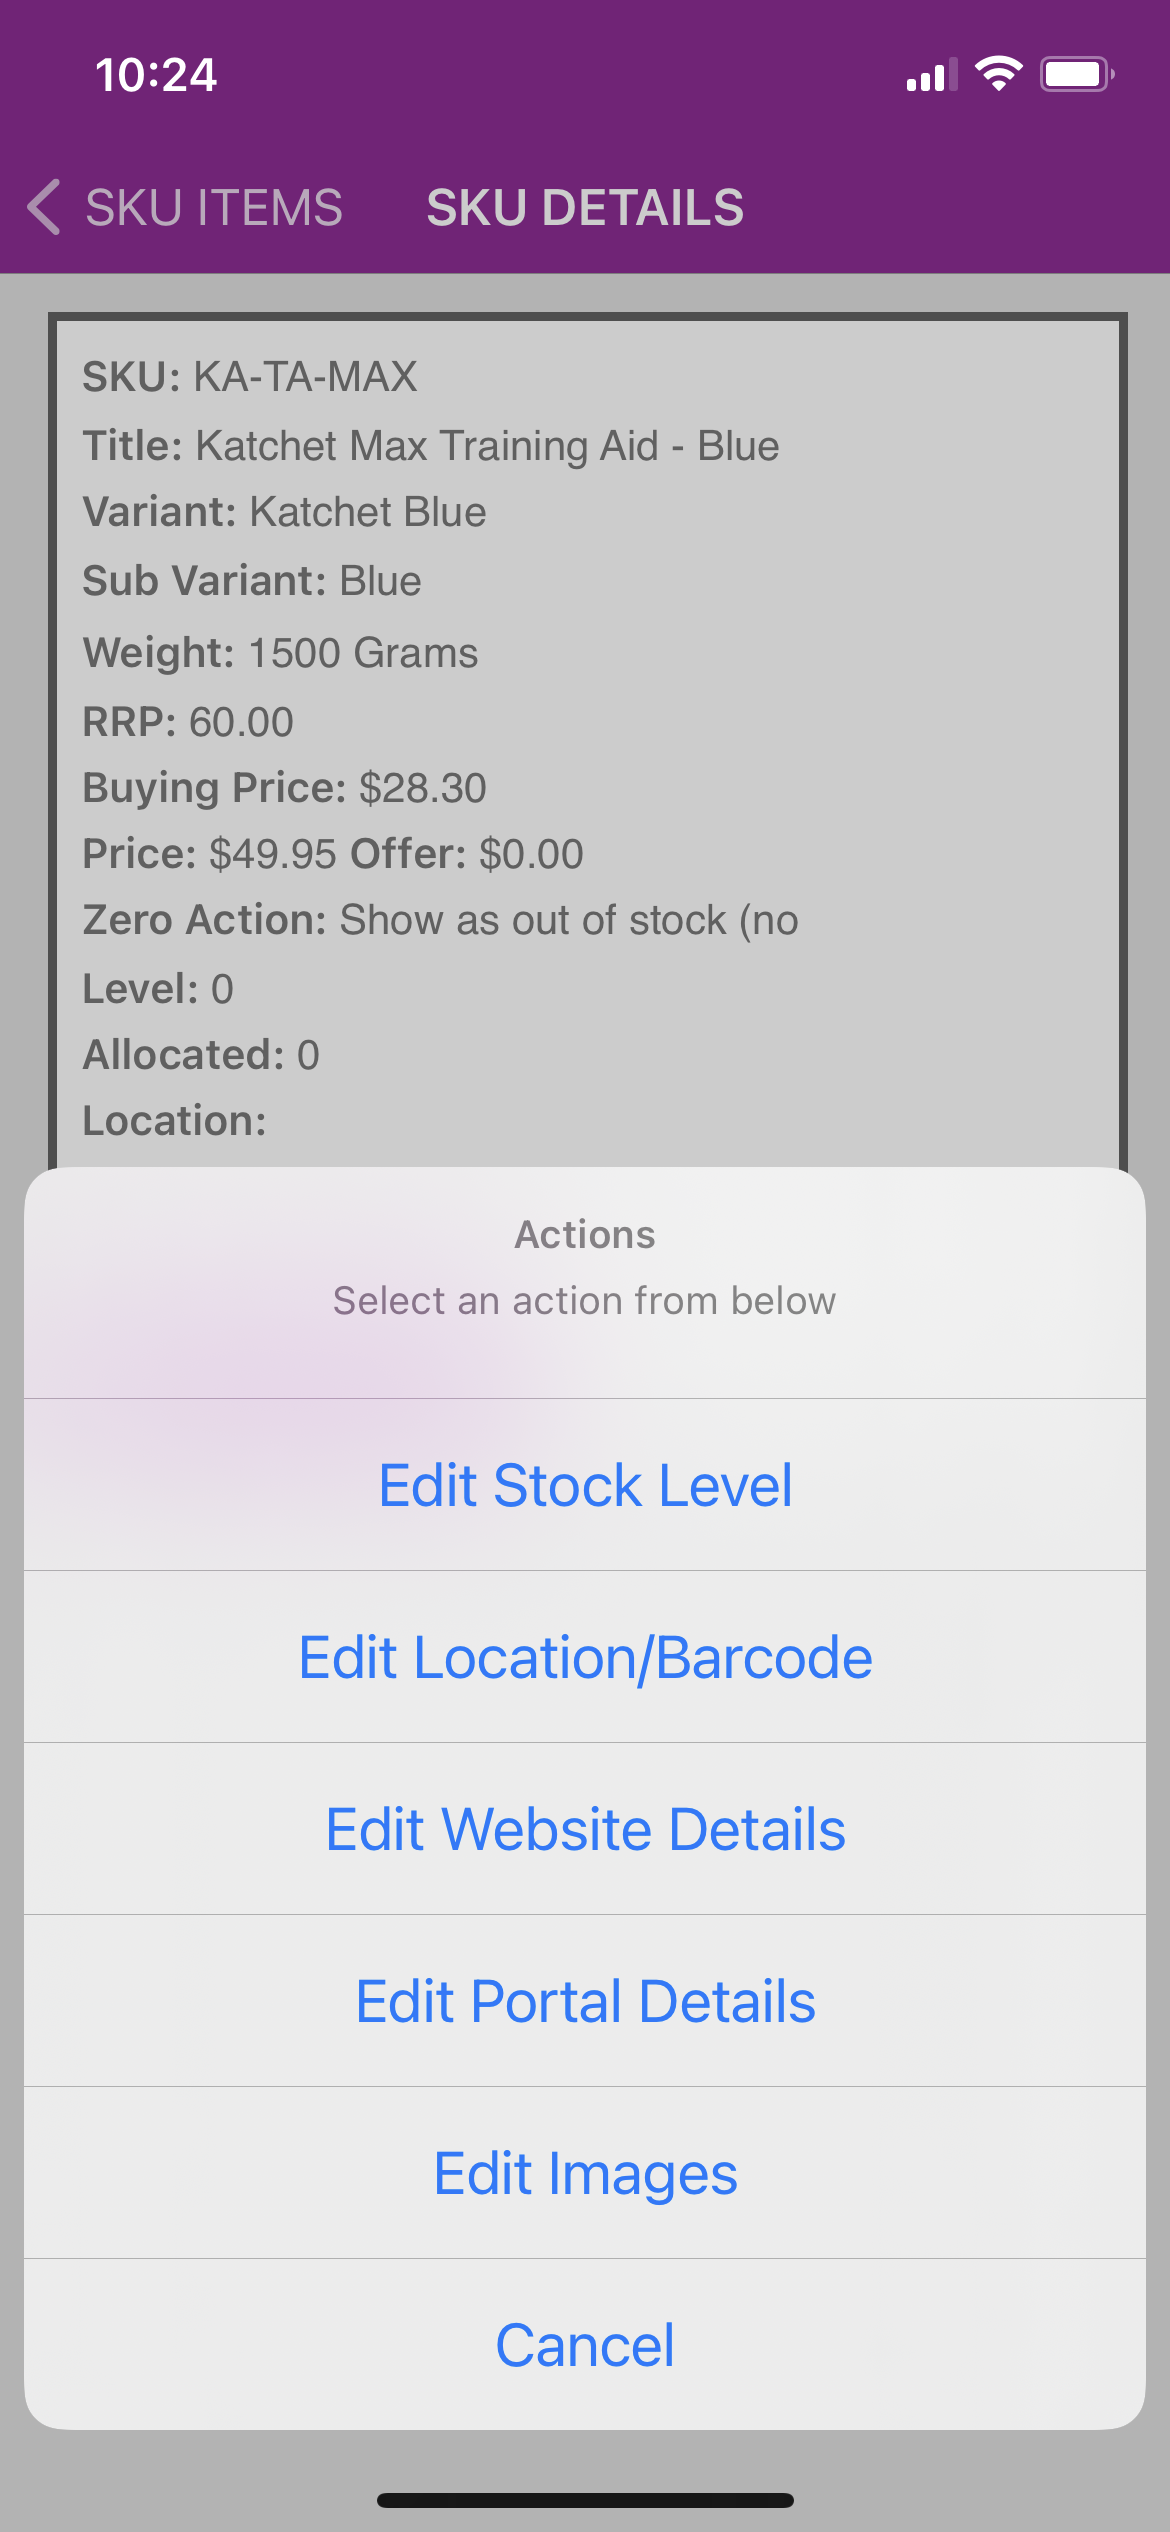 Edit Stock Level (edits the current master stock level for the product)
- Edit Bin Location/Barcode
- Edit Website Details (edit costs & shows the product as live)
- Edit Portal Details (ebay/Amazon) (edit costs & shows the product as live)
- Edit Images
Adding a new product
- Click 'New Product' button.
- Populate all fields and click the 'Save Product' button.
- Your new product has now been entered into the CMS.
Please note: if you have more than one e-commerce website, you must first select the website in the first field, before completing all other fields.
Pick & Pack
The dispatch area works in conjunction with the Ngage Desktop POS system, navigate to the dispatch area on your POS Desktop and you will see a list of orders, the right column shows the status of the order. Once the status is green (DIS) you are then able to add delivery tracking information and print delivery notes.
Statuses:
- ORP – Order Ready for Picking (Order is complete and ready for picking).
- PIP – Pick in Process (The scanner has started the pick process).
- DIS – Dispatch Enabled (The scanner has completed the pick process).
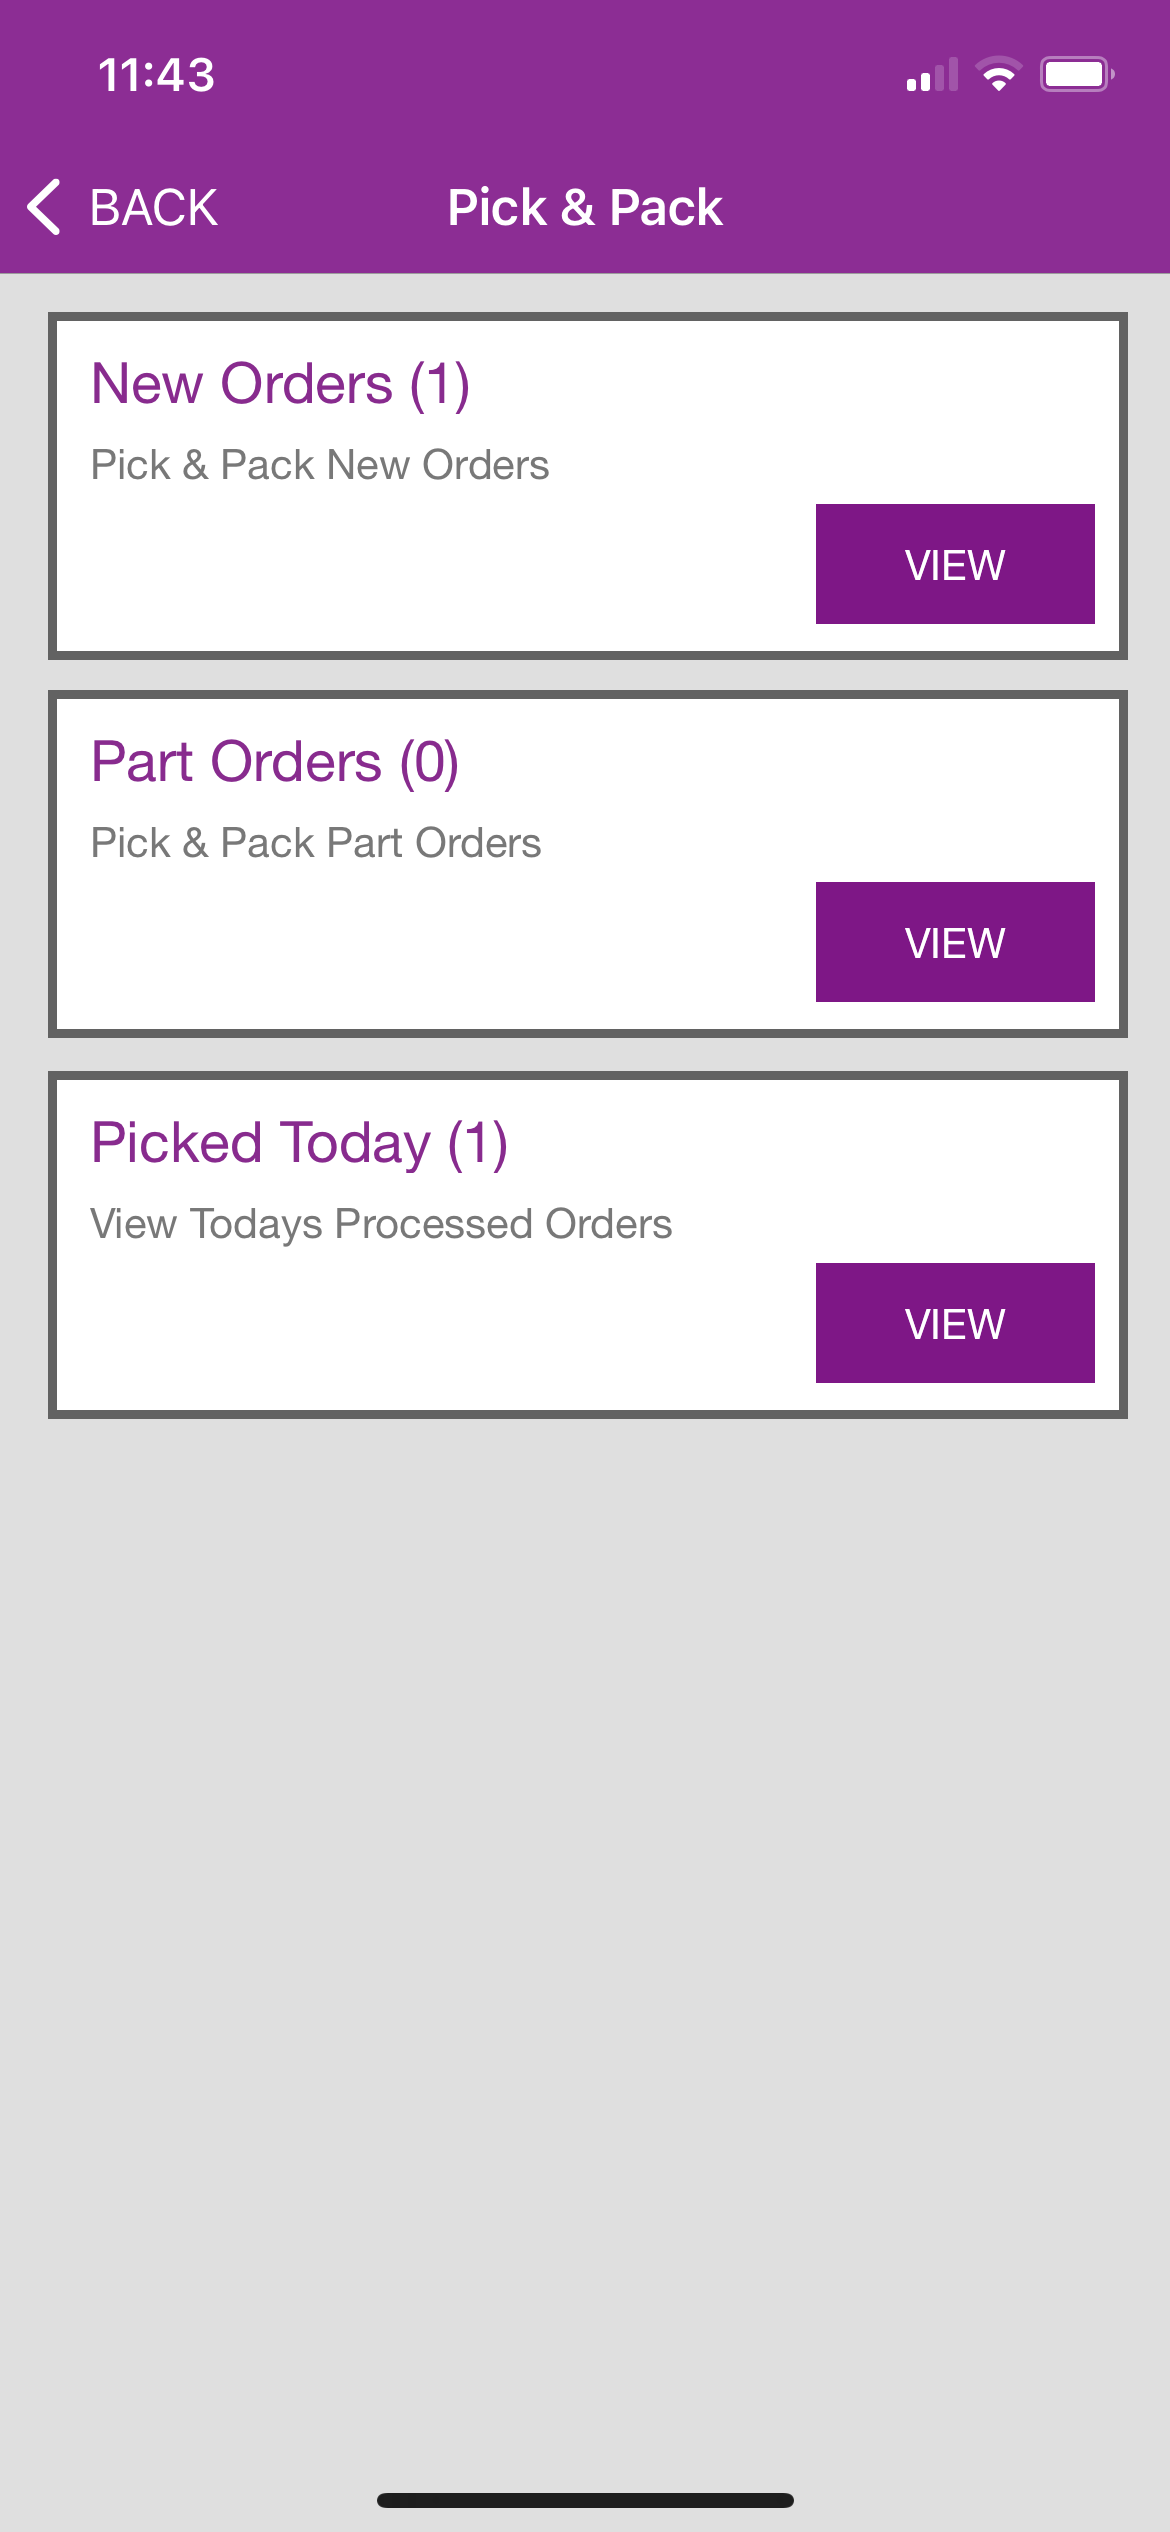
On the scanner app click on Pick & Pack, you then have three options:
- New Orders (Displays any new orders awaiting pick and pack).
- Part Orders (Displays any orders which have been part picked with outstanding order items).
- Picked Today (Displays orders picked in the last 24 hours, allows orders to be modified if required).
 Processing an order
- Click on 'New Orders'.
- A list of orders ready for picking will be displayed.
- Click on one of the orders.
- A list of order items will be displayed.
- Click on an item or scan a product barcode.
- Details of the order item will be displayed, including the warehouse location and the order qty.
- Enter the quantity picked.
- Click on the 'Back' button at the top.
- You will notice the colour of the processed order item will change to green (full qty picked) or amber (part picked).
- Once all order items have been picked, you will be promoted to confirm the order is complete.
- If you select 'Yes' the order will then be marked as DIS.
- The order can now be processed within the Desktop POS, adding tracking info and printing delivery notes.